FM Radio
Published: January 16, 2026
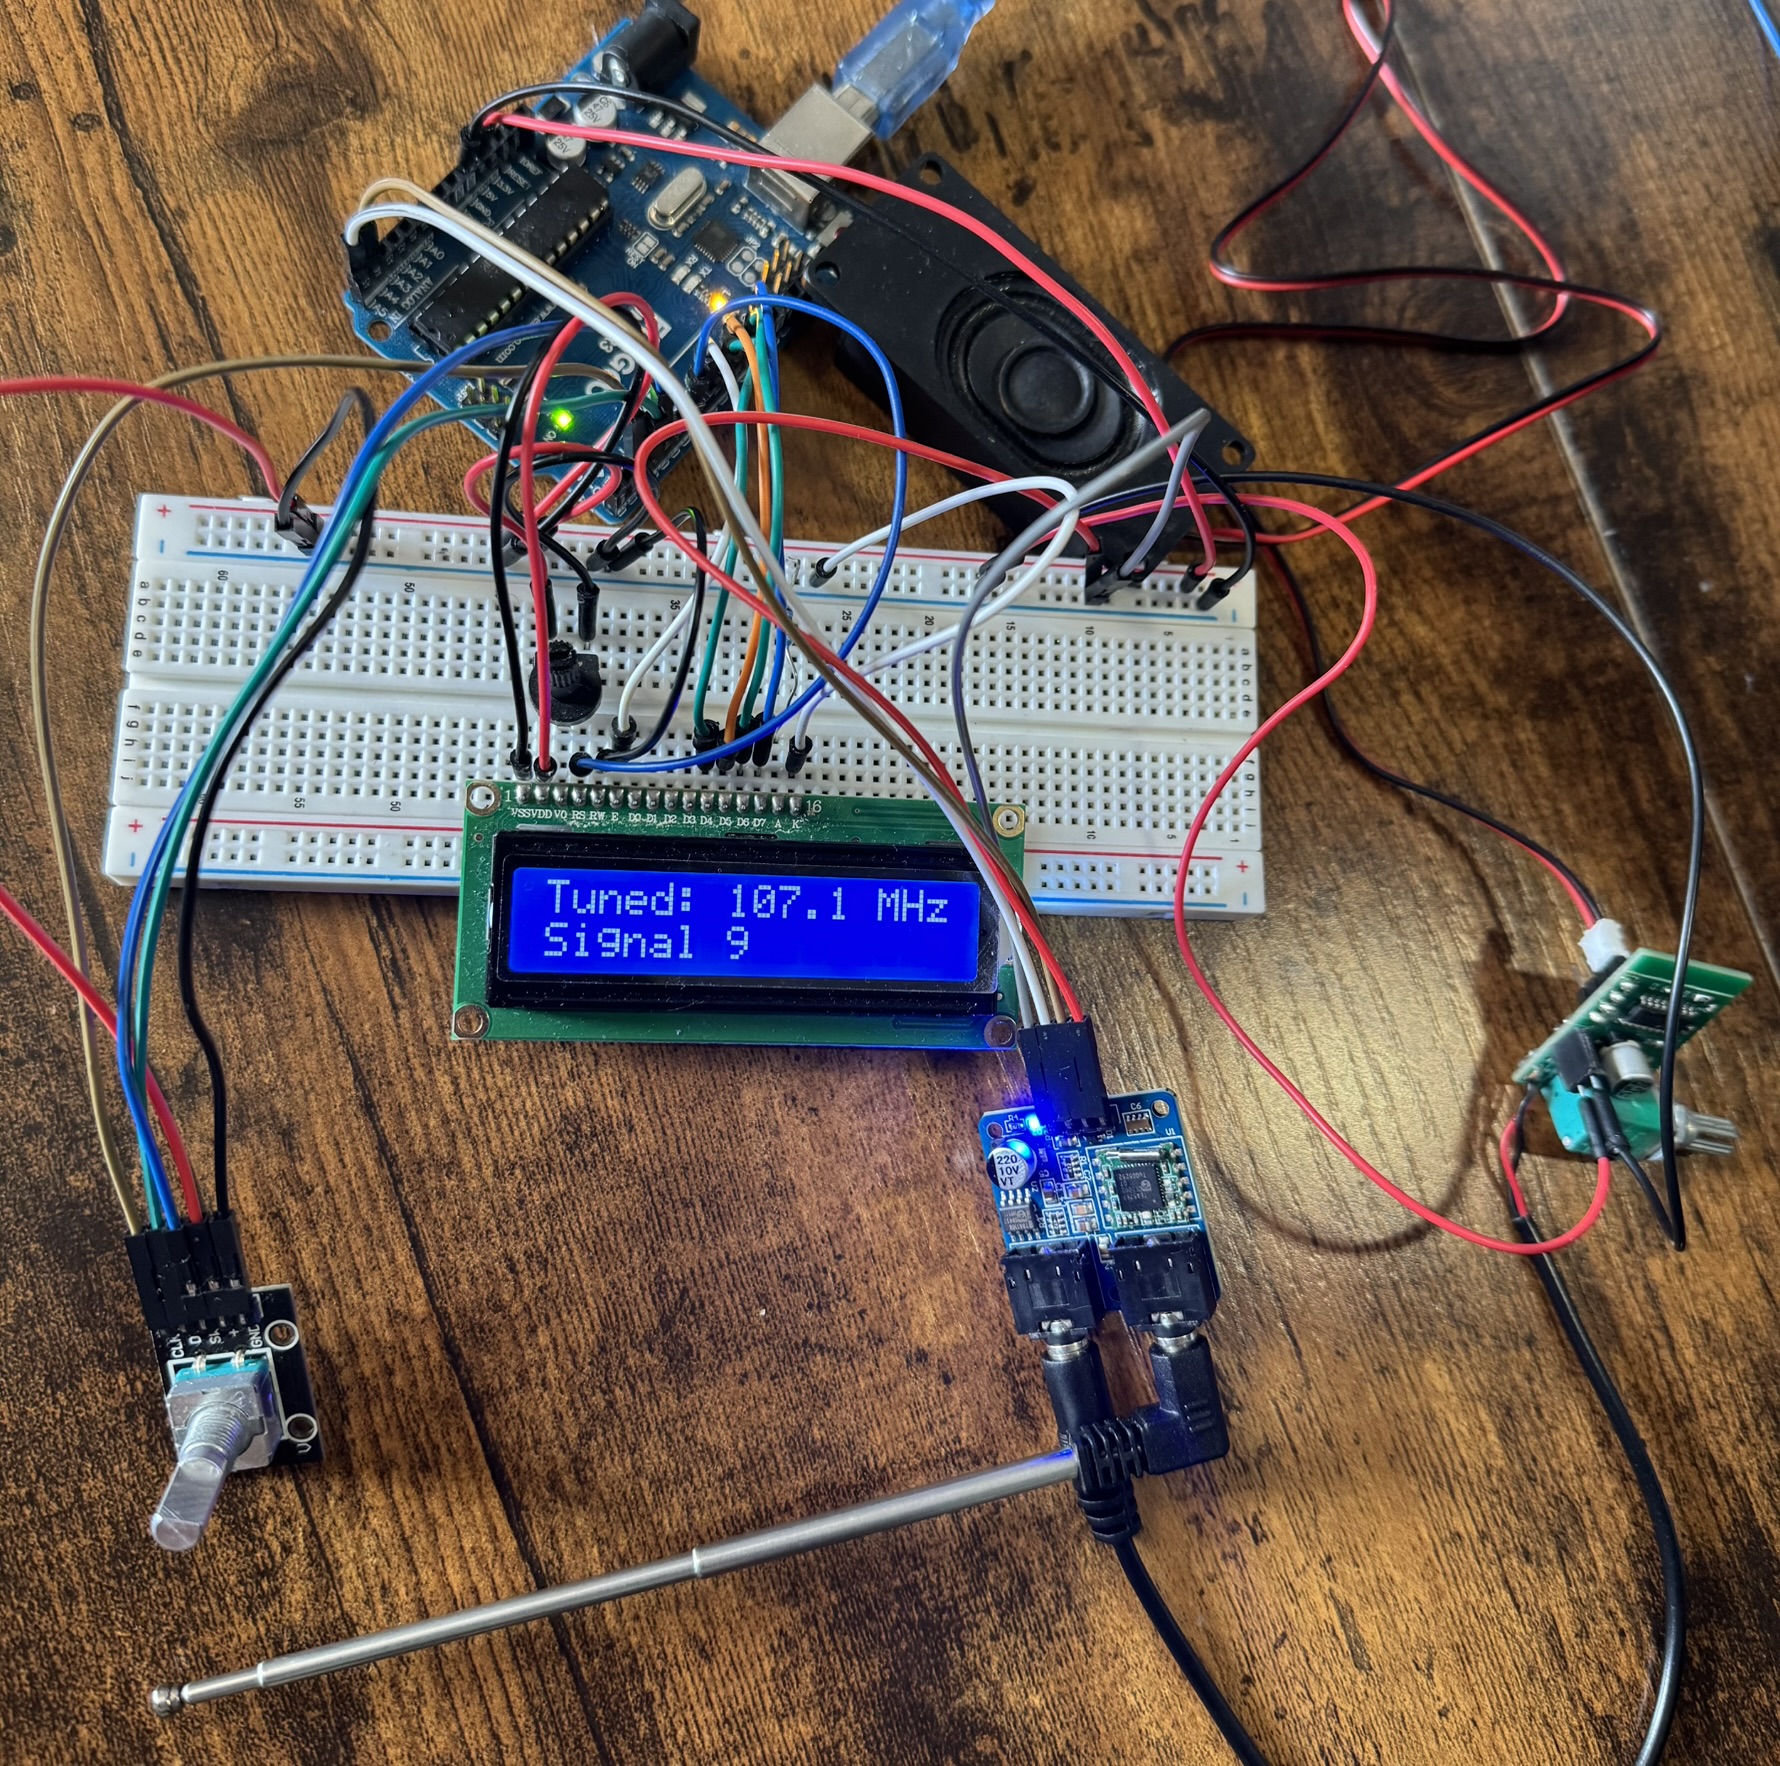
This project is an Arduino-powered FM radio that uses the TEA5767 radio module, an LCD1602 display, a rotary encoder for tuning, and a PAM8403 audio amplifier to drive a speaker. With this build, you can manually tune stations with the rotary knob, auto-seek the next available station with a button press, and listen through a connected speaker. It’s a compact DIY radio project that combines digital control with classic FM listening.
📸 Preview
⚙️ How It Works:
- The Arduino UNO acts as the brain, controlling the TEA5767 FM radio module over the I²C bus.
- The TEA5767 module handles the actual FM signal reception and outputs the audio signal through its 3.5 mm headphone jack.
- A rotary encoder lets you tune the frequency manually.
- Pressing the encoder button triggers an auto-seek to the next station.
- The LCD1602 shows the tuned frequency.
- PAM8403 amplifier powers a small speaker for audio output.
🧰 Parts & Materials Used
| Component | Notes |
|---|
| Arduino UNO | Main microcontroller board |
| TEA5767 FM Radio Module | FM receiver, communicates via I²C |
| LCD1602 Display (16-pin) | Shows frequency and status |
| Rotary Encoder with Push Button | Manual tuning + auto-seek button |
| PAM8403 Audio Amplifier | Drives speaker output |
| 3W 8Ω Speaker | Audio output |
| 10k Potentiometer | LCD contrast control |
| 3.5mm Male-to-Bare Wire Cable | Connects TEA5767 audio to amp |
| Breadboard + Wires | Prototyping |
| Power Source | USB or 5V battery bank |
🔌 Wiring Instructions
TEA5767 Module → Arduino
| TEA5767 Pin | Arduino Pin | Notes |
|---|
| VCC | 5V | Module is 5V-tolerant |
| GND | GND | Common ground |
| SDA | A4 | I²C data |
| SCL | A5 | I²C clock |
LCD1602 Display → Arduino
| LCD Pin | Arduino Pin | Notes |
|---|
| VSS | GND | Ground |
| VDD | 5V | Power |
| VO | Middle of Potentiometer | Contrast control |
| RS | D7 | Register select |
| RW | GND | Always LOW (write mode) |
| E | D8 | Enable |
| D4 | D9 | Data |
| D5 | D10 | Data |
| D6 | D11 | Data |
| D7 | D12 | Data |
| A | 5V | Backlight + |
| K | GND | Backlight – |
Rotary Encoder → Arduino
| Encoder Pin | Arduino Pin |
|---|
| CLK | D2 |
| DT | D3 |
| SW | D4 |
| +V | 5V |
| GND | GND |
PAM8403 Audio Amplifier
| PAM Pin | Connection |
|---|
| Power + | Arduino 5V |
| Power – | Arduino GND |
| G | Black aux wire |
| B (R-in) | Red aux wire |
| Speaker +/- | To speaker terminals |
🧾 Arduino Code
Language: C++
#include <Wire.h>
#include <LiquidCrystal.h>

// ------ LCD pins (RS, E, D4, D5, D6, D7) ------
LiquidCrystal lcd(7, 8, 9, 10, 11, 12);

// ------ Rotary encoder ------
const uint8_t ENC_A = 2;   // CLK
const uint8_t ENC_B = 3;   // DT
const uint8_t ENC_SW = 4;  // push button
volatile int8_t encDelta = 0;
volatile uint8_t lastAB = 0;

// ------ TEA5767 ------
const uint8_t TEA5767_ADDR = 0x60;      // I2C address
float freqMHz = 101.1;                   // start frequency
const float F_MIN = 87.0, F_MAX = 108.0;
const float STEP  = 0.1;                 // MHz
const uint8_t RSSI_THRESHOLD = 8;        // 0..15 (raise if it stops on noise)

// ---- helpers ----
void tea5767SetFrequency(float mhz) {
  uint16_t pll = (uint16_t)((4.0 * (mhz * 1000000.0 + 225000.0)) / 32768.0);
  uint8_t data[5];
  data[0] = (pll >> 8) & 0x3F;           // MUTE=0, SM=0
  data[1] = pll & 0xFF;
  data[2] = 0xB0;                        // HLSI=1, SSL mid, stereo
  data[3] = 0x10;                        // XTAL=1 (32.768kHz)
  data[4] = 0x08;                        // 50µs de-emphasis (UK/EU)
  Wire.beginTransmission(TEA5767_ADDR);
  Wire.write(data, 5);
  Wire.endTransmission();
}

bool tea5767Read(uint8_t buf[5]) {
  Wire.requestFrom((uint8_t)TEA5767_ADDR, (uint8_t)5); // explicit cast
  for (uint8_t i = 0; i < 5 && Wire.available(); i++) buf[i] = Wire.read();
  return true;
}

// RSSI (signal level) is in byte3[7:4] -> 0..15
uint8_t tea5767SignalLevel() {
  uint8_t r[5]; tea5767Read(r);
  return (r[3] >> 4) & 0x0F;
}

// optional “ready” flag: byte0 bit7
bool tea5767Ready() {
  uint8_t r[5]; tea5767Read(r);
  return (r[0] & 0x80) != 0;
}

void updateLCD() {
  lcd.setCursor(0, 0);
  lcd.print("Tuned: ");
  lcd.print(freqMHz, 1);
  lcd.print(" MHz   ");
}

void encISR() {
  uint8_t a = digitalRead(ENC_A);
  uint8_t b = digitalRead(ENC_B);
  uint8_t ab = (a << 1) | b;
  static const int8_t table[16] = {0,-1,+1,0,+1,0,0,-1,-1,0,0,+1,0,+1,-1,0};
  encDelta += table[(lastAB << 2) | ab];
  lastAB = ab;
}

void setup() {
  Wire.begin();
  pinMode(ENC_A, INPUT_PULLUP);
  pinMode(ENC_B, INPUT_PULLUP);
  pinMode(ENC_SW, INPUT_PULLUP);
  attachInterrupt(digitalPinToInterrupt(ENC_A), encISR, CHANGE);
  attachInterrupt(digitalPinToInterrupt(ENC_B), encISR, CHANGE);

  lcd.begin(16, 2);
  lcd.print("Initializing...");
  delay(200);

  tea5767SetFrequency(freqMHz);
  lcd.clear(); updateLCD();
  lcd.setCursor(0, 1); lcd.print("Rotate: tune   ");
}

void loop() {
  // rotary tuning
  noInterrupts(); int8_t d = encDelta; encDelta = 0; interrupts();
  if (d != 0) {
    freqMHz += d * STEP;
    if (freqMHz < F_MIN) freqMHz = F_MIN;
    if (freqMHz > F_MAX) freqMHz = F_MAX;
    tea5767SetFrequency(freqMHz);
    updateLCD();
  }

  // button: auto-seek forward
  if (digitalRead(ENC_SW) == LOW) {
    lcd.setCursor(0, 1); lcd.print("Auto-seeking...");

    float start = freqMHz;
    while (true) {
      // step forward & wrap
      freqMHz += STEP;
      if (freqMHz > F_MAX) freqMHz = F_MIN;
      tea5767SetFrequency(freqMHz);
      delay(50);                   // small settle time

      // check signal strength
      uint8_t lvl = tea5767SignalLevel();
      if (lvl >= RSSI_THRESHOLD && tea5767Ready()) {
        updateLCD();
        lcd.setCursor(0,1);
        lcd.print("Signal ");
        lcd.print(lvl);
        lcd.print("         ");
        break;
      }

      // safety: stop if we wrapped around without finding anything
      if (fabs(freqMHz - start) < 0.001f) {
        lcd.setCursor(0,1); lcd.print("No station     ");
        break;
      }
    }
    delay(250); // debounce
  }
}
📝 Notes
- Rotating the encoder adjusts frequency in 0.1 MHz steps.
- Pressing the encoder triggers auto-seek to the next strong station.
- Signal strength is evaluated using the TEA5767’s RSSI reading.
- Use the amplifier’s physical knob to control volume.
- Adjust the LCD’s contrast using the 10k potentiometer for best visibility.
💻 Upload the Code
- Connect your Arduino UNO via USB.
- Open Arduino IDE and select your board + port.
- Paste the full FM Radio code into the IDE.
- Click Upload.
- Once uploaded, the LCD will show the frequency. Tune and listen!
← Back to Projects