ESP32 Tilt Arcade Console
Published: July 27, 2026
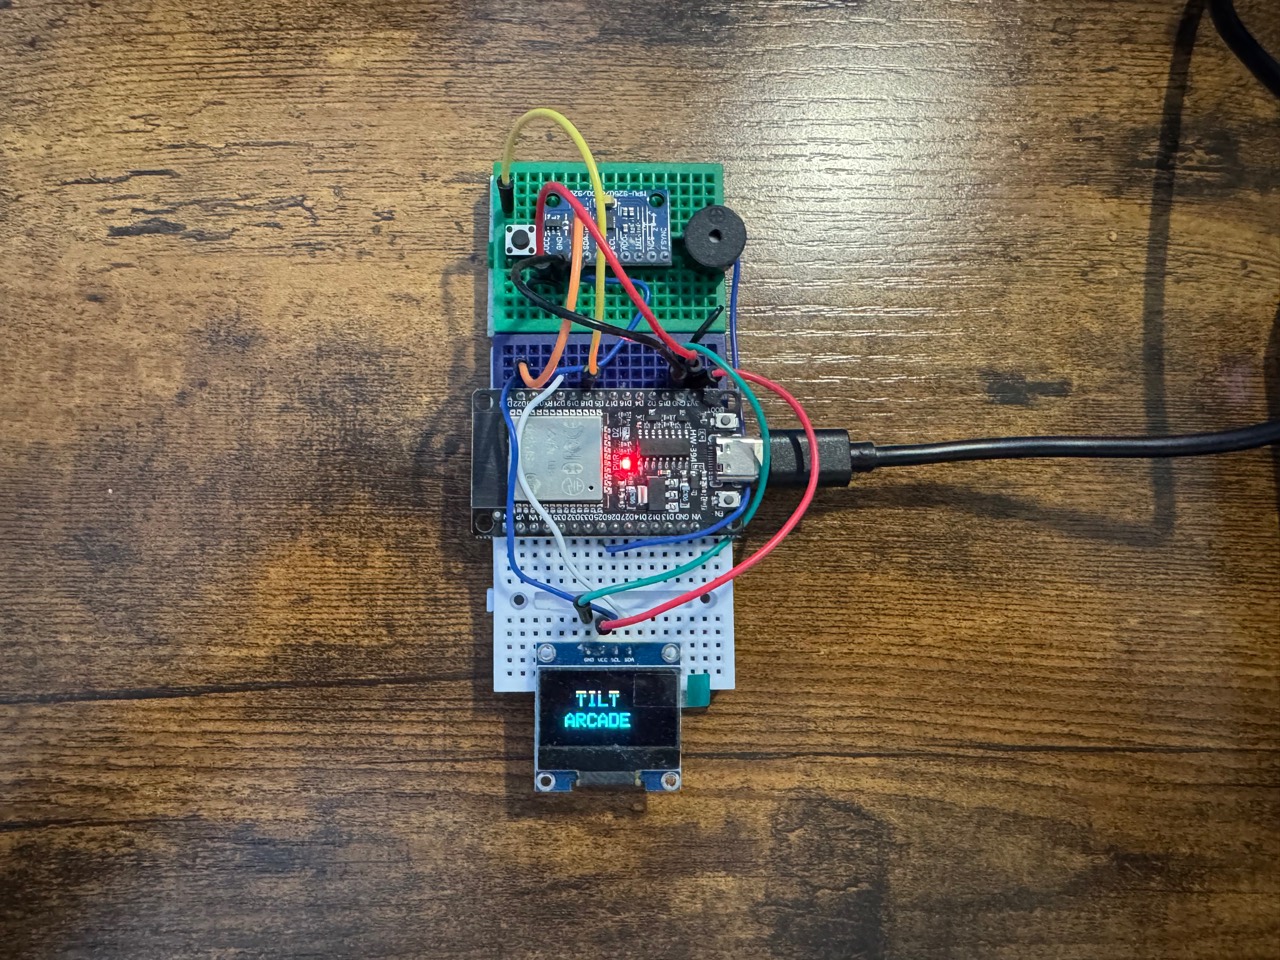
This project takes my earlier Arduino Nano tilt consoles and rebuilds them around an ESP32. The extra memory and processing power made it possible to combine four games, a particle fluid simulator, and an animated robot face in one compact OLED system.
The console is controlled by tilting an MPU-6500 motion sensor. One push button handles the menu and in-game actions, while a passive buzzer provides sound feedback.
📸 Preview
⚙️ How It Works
- The ESP32 runs the menu, all six modes, sound effects, calibration, and saved scores.
- The OLED and MPU-6500 share the ESP32's I2C bus on GPIO21 and GPIO22.
- The firmware converts live accelerometer readings into movement or simulated gravity.
- Each mode stores its own neutral tilt calibration in EEPROM.
- High scores are saved for Coin Collector, Tilt Snake, and Space Dodger.
- A single button supports short, long, and very long presses for different actions.
- The Vector Face reacts to tilt, cycles expressions, blinks, and responds to shaking.
🎮 Games and Modes
| Mode | Description |
|---|---|
| Tilt Maze | Guide a ball through maze walls and reach the goal. |
| Coin Collector | Collect coins against a timer and try to beat the saved high score. |
| Tilt Snake | Control a growing snake, collect blinking food, and avoid collisions. |
| Space Dodger | Move a spaceship left and right while avoiding falling asteroids. |
| Fluid Sim | Tilt the console to change gravity and move 120 simulated particles. |
| Vector Face | Interact with an animated face featuring gaze, expressions, blinking, and a shake-to-dizzy reaction. |
🧰 Components Used
| Component | Purpose |
|---|---|
| ESP32 Dev Module | Runs the console and all six modes |
| 128×64 I2C OLED display | Displays the menu, games, simulation, and robot face |
| MPU-6500-family IMU | Measures tilt and motion |
| Push button | Controls menu navigation and mode actions |
| Passive buzzer | Provides sound feedback |
| Breadboard and jumper wires | Connect the prototype |
| USB cable or power bank | Powers and programs the ESP32 |
🔌 Wiring Instructions
OLED Display
| OLED Pin | ESP32 Pin |
|---|---|
| GND | GND |
| VCC | 3V3 |
| SDA | GPIO21 |
| SCL | GPIO22 |
MPU-6500 Motion Sensor
| IMU Pin | ESP32 Pin |
|---|---|
| GND | GND |
| VCC | 3V3 |
| SDA | GPIO21 |
| SCL | GPIO22 |
Push Button and Buzzer
| Component | Connection |
|---|---|
| Button leg 1 | GPIO18 |
| Button leg 2 | GND |
| Buzzer positive | GPIO25 |
| Buzzer negative | GND |
The button uses INPUT_PULLUP, so it reads LOW when pressed. The tested IMU was mounted with its X arrow facing upward and its Y arrow facing left.
📦 Libraries
| Library | Purpose |
|---|---|
| Adafruit SSD1306 | Controls the OLED display |
| Adafruit GFX Library | Provides graphics and drawing functions |
| Wire | Provides I2C communication |
| EEPROM | Stores calibration values and high scores |
🚀 Building and Uploading
- Install PlatformIO in VS Code.
- Clone or download the project repository.
- Open the repository folder in VS Code.
- Connect the ESP32 by USB.
- Build the project with PlatformIO.
- Select the detected serial port and upload the firmware.
- Hold the console in a comfortable position and recalibrate each mode if needed.
[env:esp32dev]
platform = espressif32
board = esp32dev
framework = arduino
monitor_speed = 115200
lib_deps =
  adafruit/Adafruit SSD1306
  adafruit/Adafruit GFX Library
🧾 Selected Code
The full firmware is available on GitHub. This selected snippet shows how the six modes are registered in the menu.
constexpr uint8_t GAME_MAZE = 0;
constexpr uint8_t GAME_COIN = 1;
constexpr uint8_t GAME_SNAKE = 2;
constexpr uint8_t GAME_DODGER = 3;
constexpr uint8_t GAME_FLUID = 4;
constexpr uint8_t GAME_FACE = 5;
constexpr uint8_t GAME_COUNT = 6;

const char *const GAME_NAMES[GAME_COUNT] = {
    "Tilt Maze",
    "Coin Collector",
    "Tilt Snake",
    "Space Dodger",
    "Fluid Sim",
    "Vector Face",
};
View the complete ESP32 project on GitHub
📝 Notes
- The tested board was an ESP32 Dev Module with an ESP32-D0WD-V3 chip, 4 MB flash, and a CH340 USB interface.
- The OLED address is
0x3C, and the IMU is checked at0x68and0x69. - Use 3.3 V for the OLED and IMU in this ESP32 build.
- The ESP32 provides much more memory headroom than the Arduino Nano versions.
- The repository contains the complete firmware but currently requires a final licensing review before reuse terms are formally stated.